You need to download ClassIn APP and install it in your local computer. Here is the software download URL and an account example.
i.Upload your Teaching Materials after you sign into the ClassIn System
➤ After sign into ClassIn, you will be in this following window:
If your account is associated with a lesson, i.e., there is a lesson assign to your account, you will find your lesson information in Rectangular B area. When time close by, you can click “Enter” to enter the online classroom. (In this illustrated picture, there wasn’t a lesson assigned to this account, so you cannot find an “Enter” button is available.)
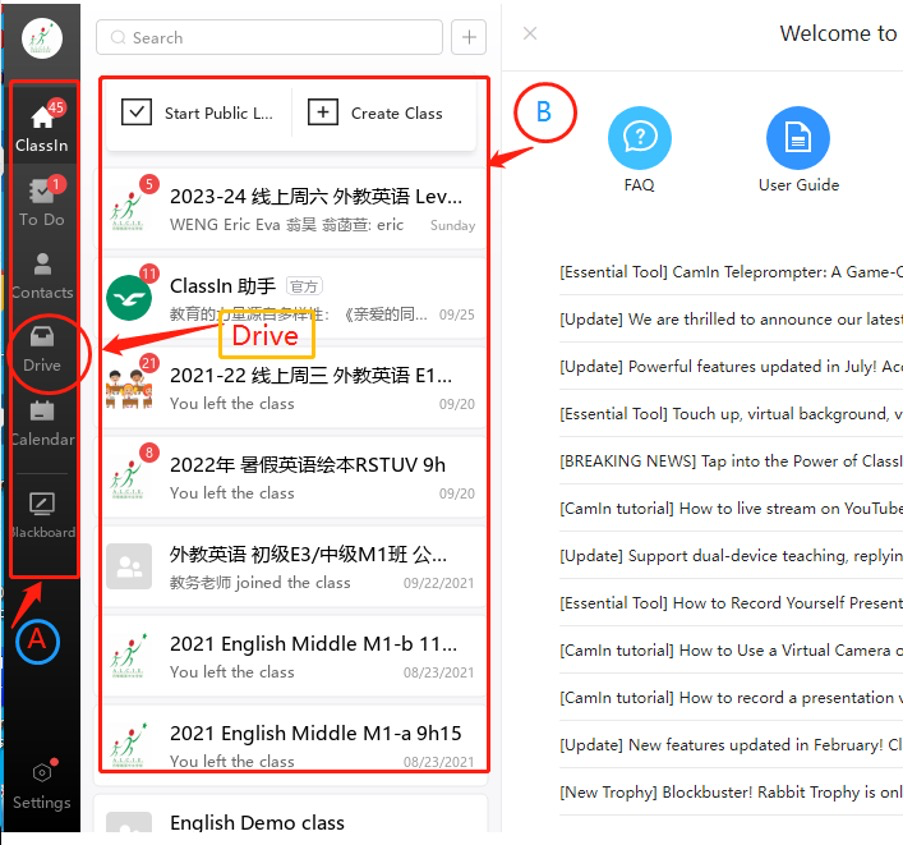
➤ The first thing for teachers to do when sign into the platform is to upload the teaching material to the system for class using purposes. To be able to upload the teaching material, just click the “Drive” button within Rectangle A area as illustrated.
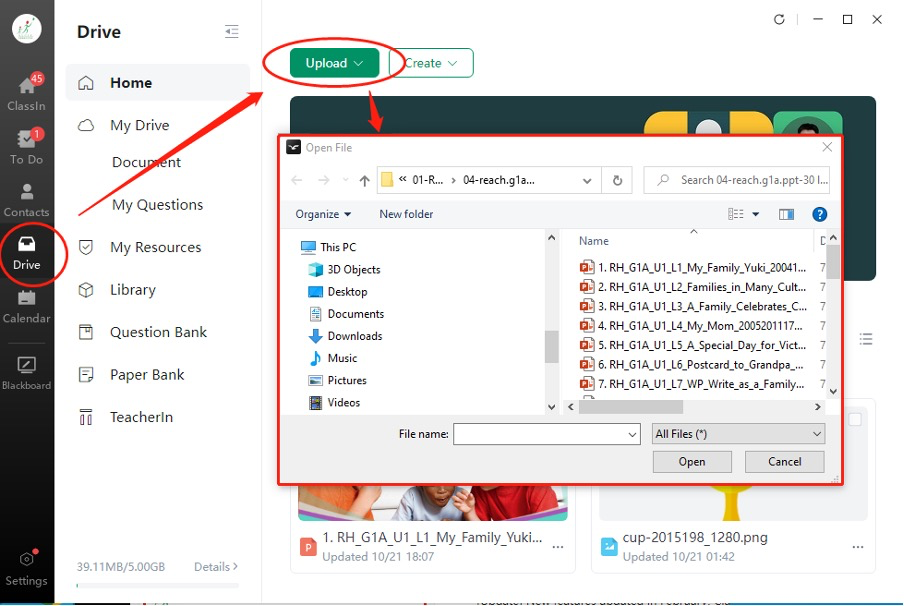
➤ After you click the “Drive” button,then click button “Upload”, as shown in the picture, and choose the material that you need to use for the class.
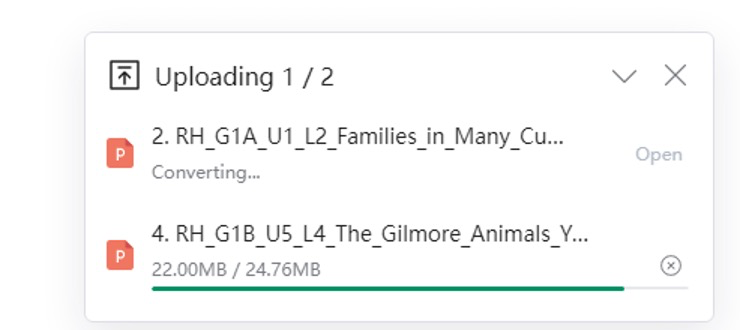
➤ By doing so, you will see the files are uploading like following illustrated:
➤ After the files/teaching materials are uploaded, you will be informed like this:

ii.Click “Blackboard” button to get in to Simulated Classroom
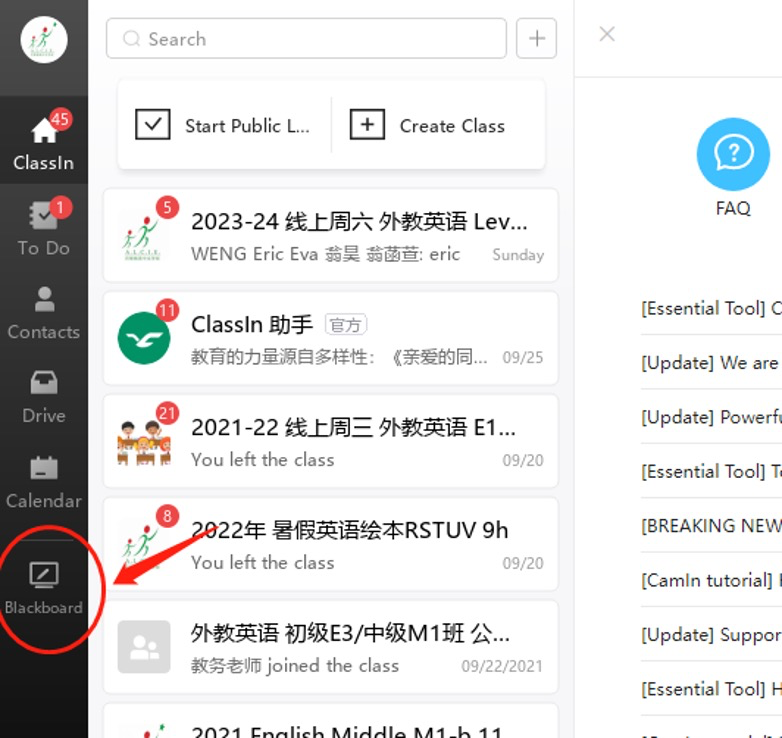
Once you are in the Blackboard environment, you will pay attention to your Mic and Camera control buttons are on the right top corner.
You can maximise your Blackboard, if it’s not
In a real lesson teaching scenario, you won’t enter the “Blackboard”, you will find your associated lesson and click the Enter button to get into the real online classroom, as per mentioned above. Please do not get confused about this. This Blackboard environment is only for your teaching practice purposes!

iii.Learn to play and share a video from local or from YouTube
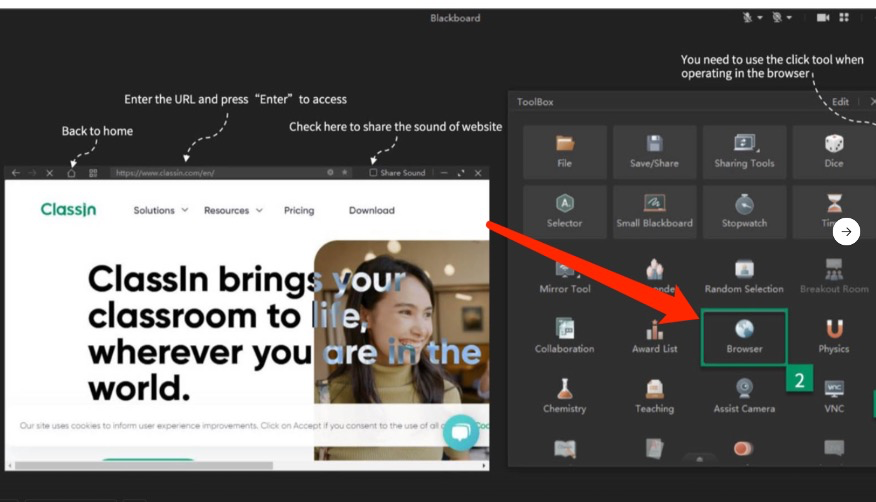
➤ Click the button “Teaching Toolbox” then click the “Browser” tool
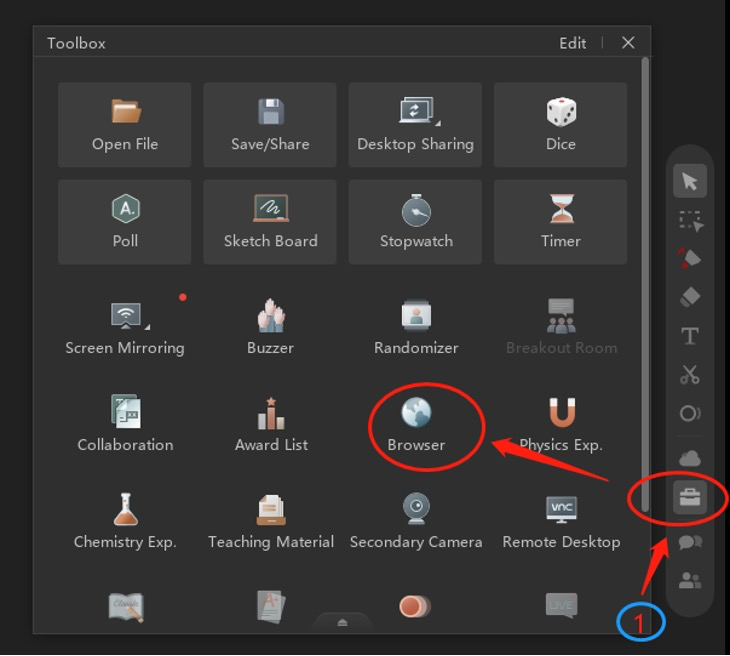
➤ Then you will get the following window and you will have two things to do;
Firstly, input your URL in the bar above as illustrated in No. 1 area; Secondly, you need remember to switch on the “Share Audio” button in No.2 area. When you successful switch on that, the dot will turn to green.
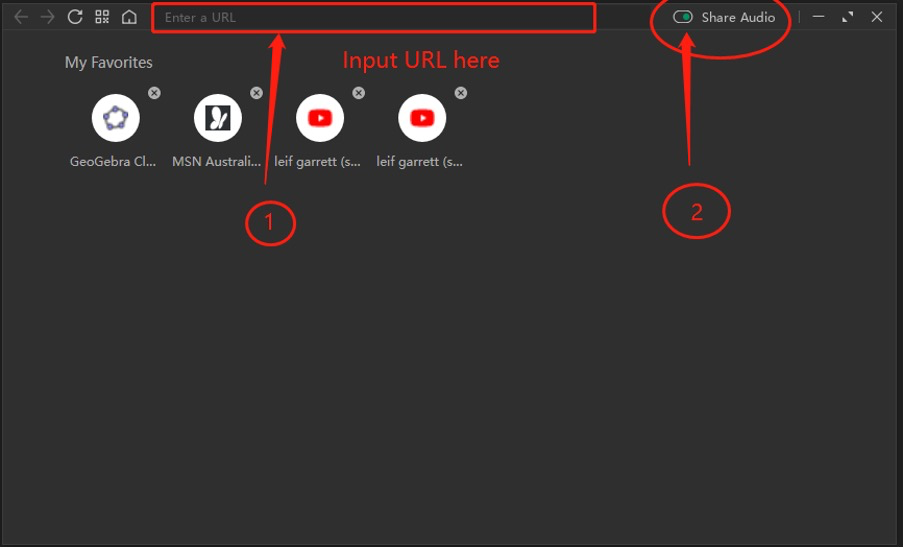
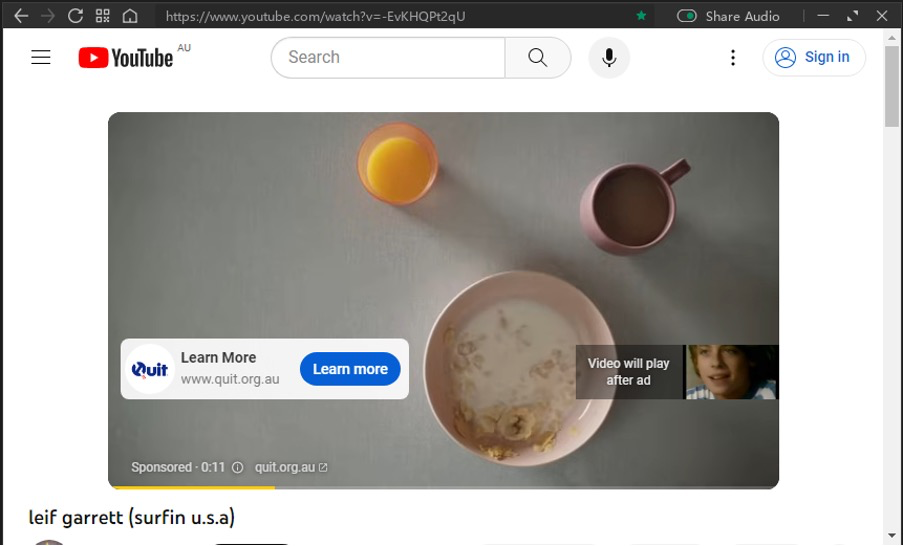
➤ So, you can share video in your classroom with your students.
iv.Share your class material with your students
Just click the Cloud-like button “Drive”, follow the step with in the picture, you will find your pre-uploaded teaching materials;
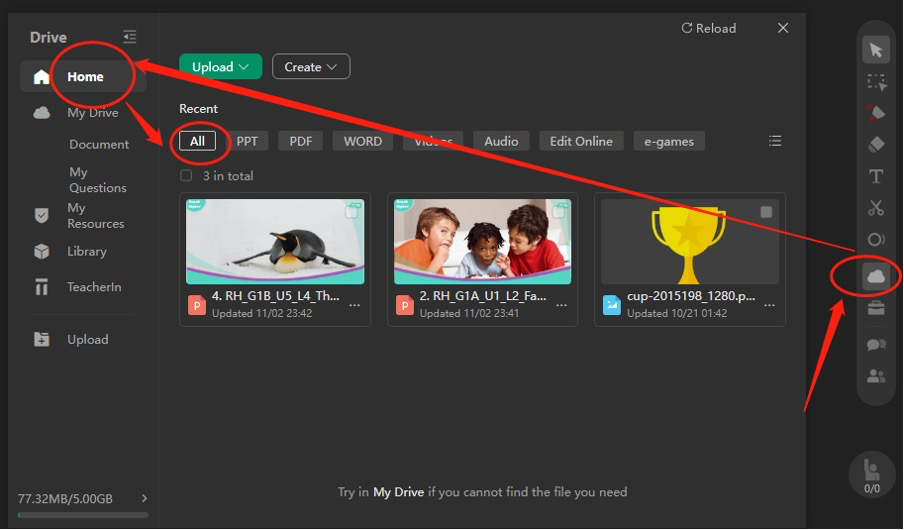
In other situation where you didn’t pre-upload your teaching materials straight after you login ClassIn system, you can still upload them here, as you can see there is a green “upload” button available for you.
<Normally, teachers need to login to the system well ahead the class begin and get all he materials ready for teaching>
Here is an additional teaching material uploading method, please feel free to check it: https://help.classin.com/b10c/d331/1c65/3310
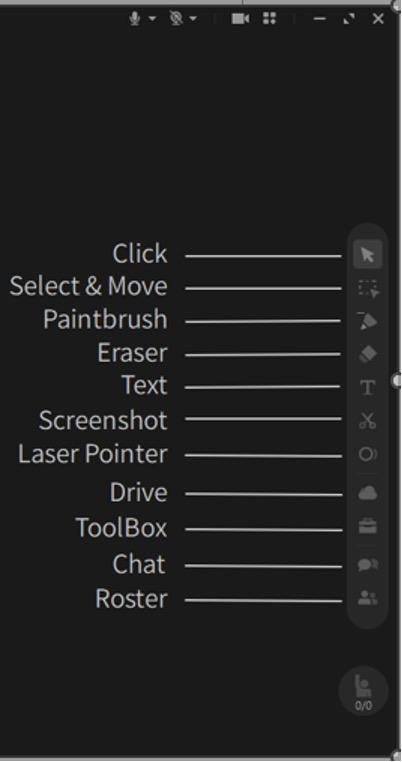
v.Learn to use the core tools, e.g., marker pen, eraser, etc.
When you move your cursor on the icon and stay there for a while, it will show you the name of the button. We just list here for your quick review purpose.
vi.Learn to use the important functions, e.g., call to stage, issue trophies, etc.
Due to page limitation, we won’t illustrate everything in this page, however there are useful links for you to learn about all these useful important functions:
:1)Moving students’ camera to blackboard, to enhance the interactivity:
https://help.classin.com/b10c/d331/982c/309d/6654
:2)Rewarding students and Deducting the reward
https://help.classin.com/b10c/d331/81d2/4b31
https://help.classin.com/b10c/d331/81d2/68f5
【Rewarding for all the on-stage students】:https://classin.baklib-free.com/bdf5/356b/50b1/2db8
:3)Muting the students
https://help.classin.com/b10c/d331/982c/569b/4237
:4)Sharing tools(just use Sharing tools)
https://help.classin.com/b10c/d331/1c65/2c19
Here is a video on how to manage students in the class. such as awarding trophies. et… which was downloaded from one of the websites. You are welcome to watch it. What we mean is that if you find that what you need to learn is not covered on this page. you are welcome to search on your own to find more information.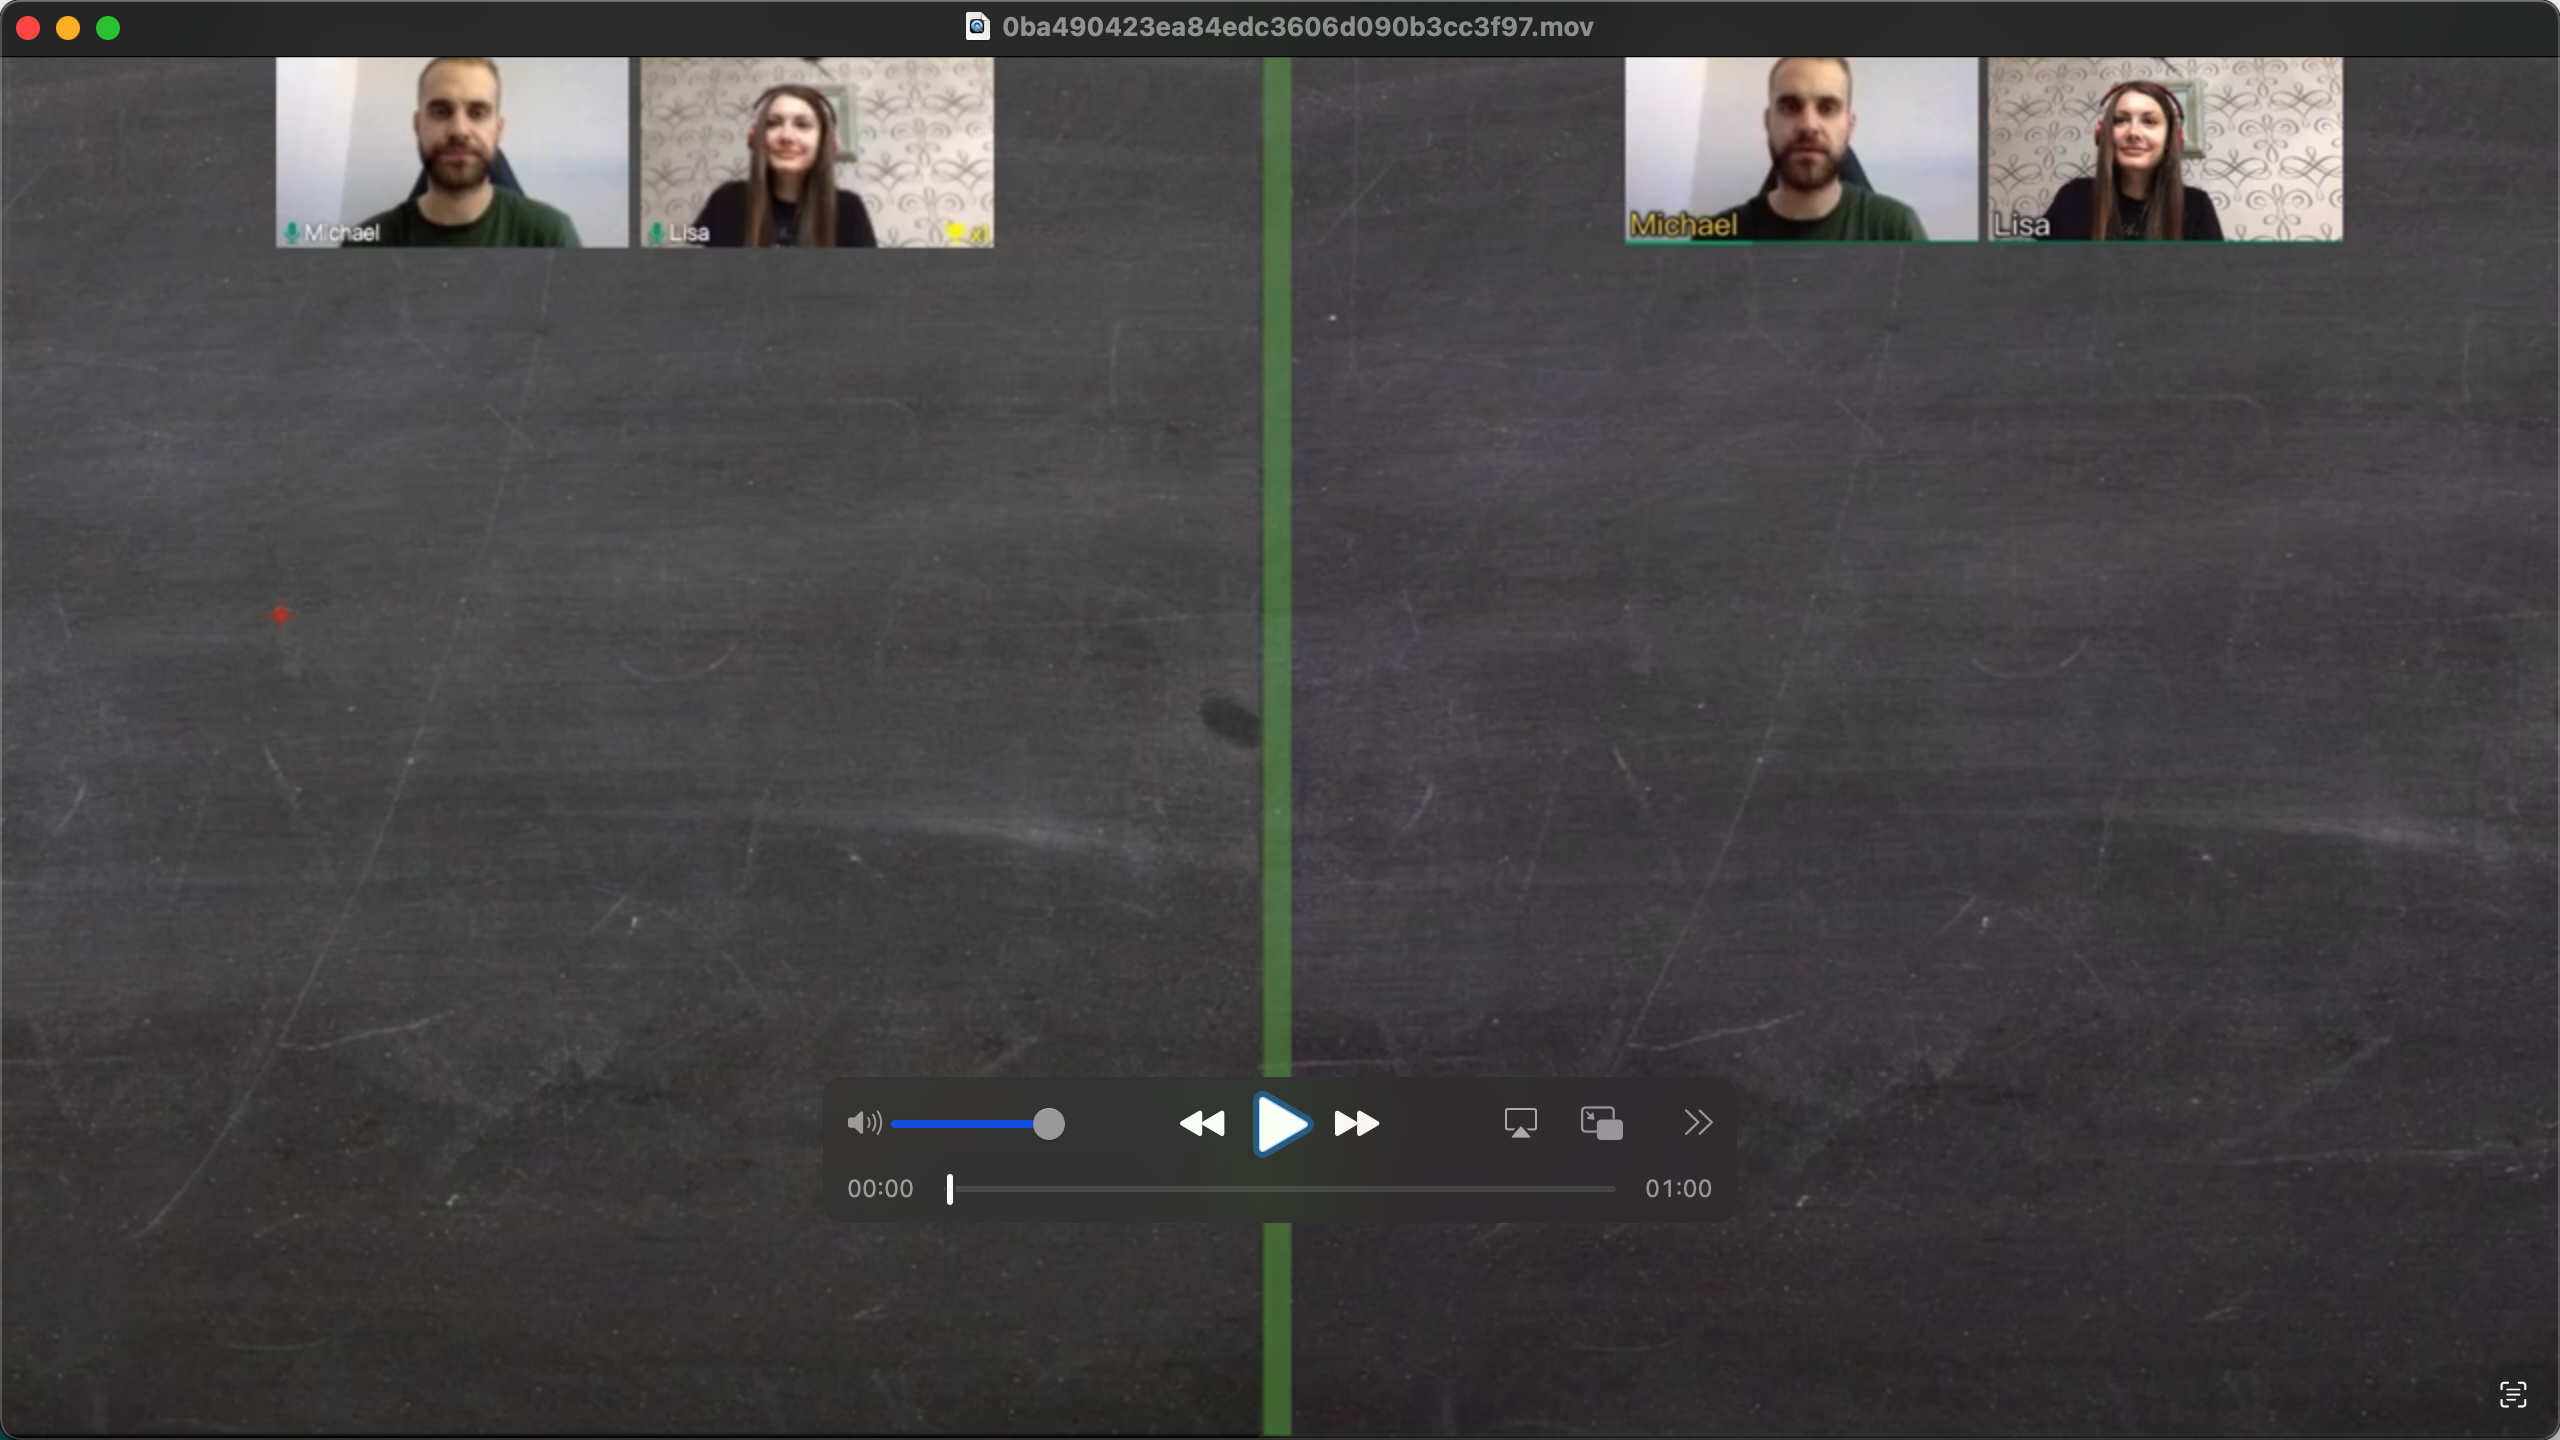
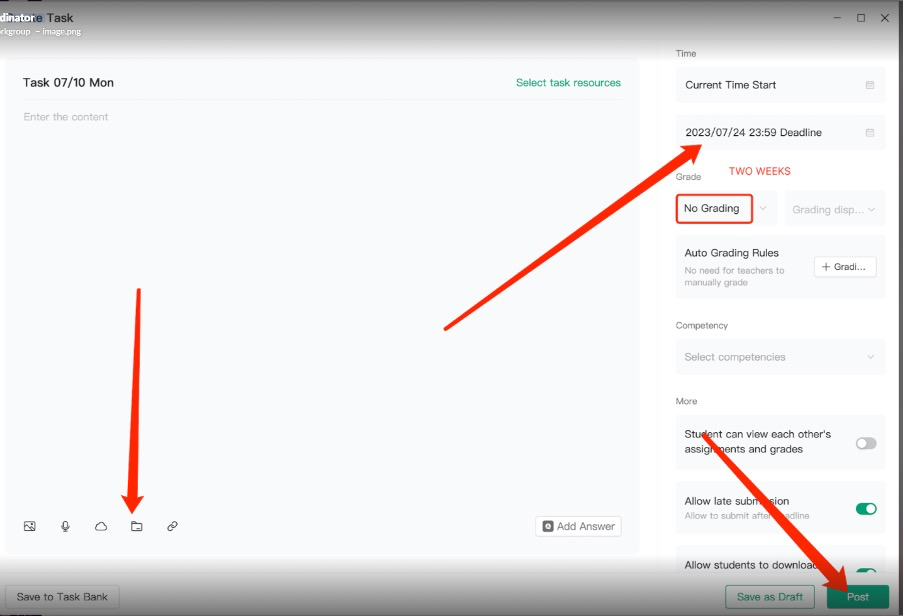
All RealTeachers’ lessons have homework.
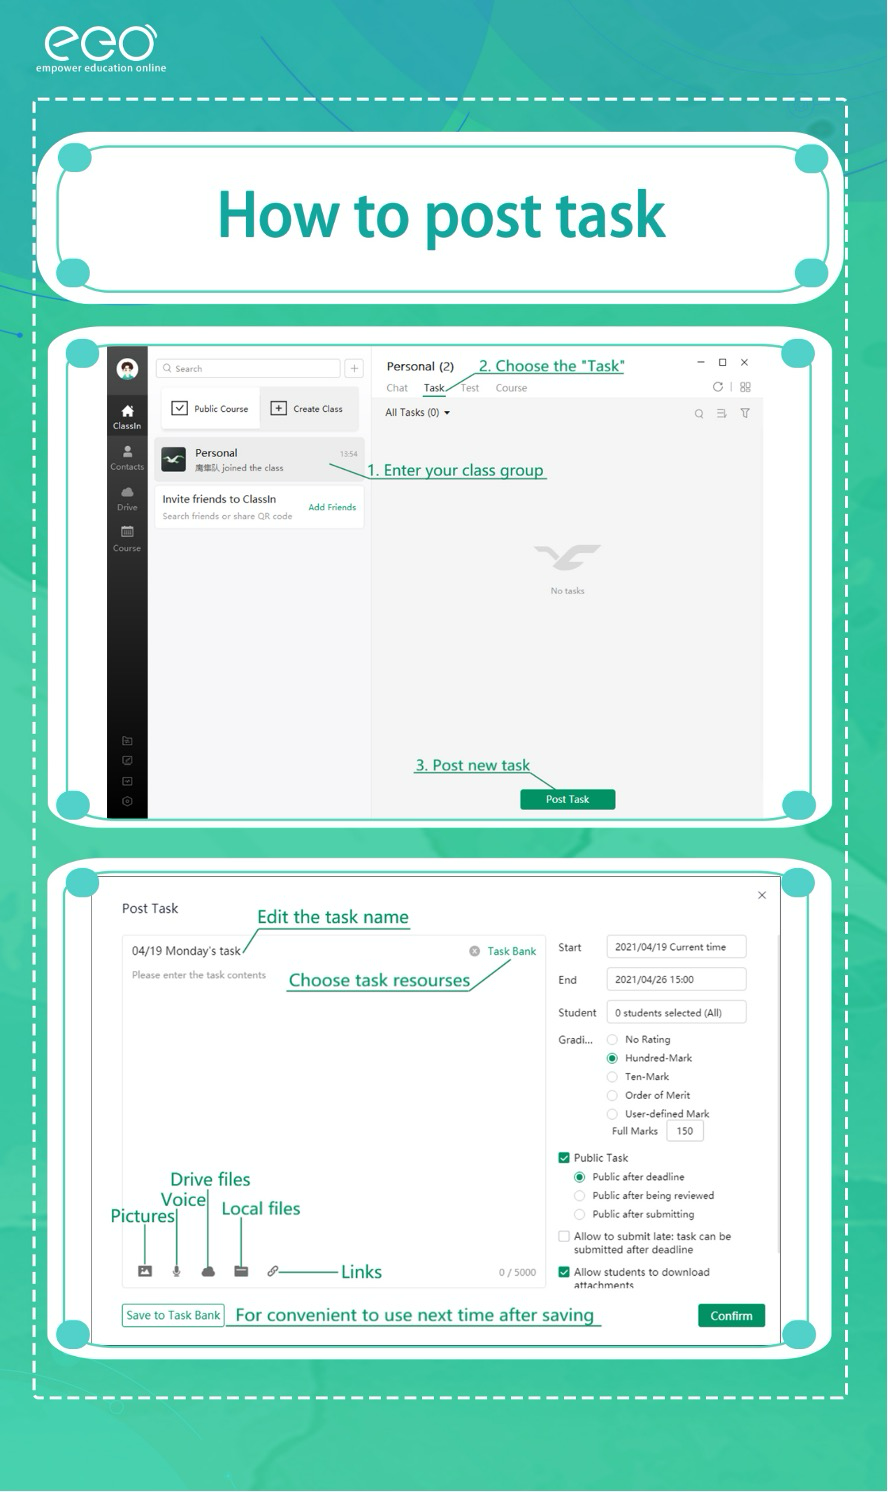
When you are going to post your Homework for students in ClassIn, please refer to this:
Please check the manual to learn more detailed knowledge about ClassIn
Please check the following tips to help with a well-prepared Classin lesson:
03-210530-ClassIn Pre Class Tips-RR-BJ-SJ
If you still need more information on “how to use classes” there is a ton of information on YouTube, do your research and it will give you everything you need.
This following link is just for an example:
https://www.youtube.com/watch?v=iHYJLka7NlY&list=PLvB4j4riufWvz518JEVjJKQh7ZrxmDXM9&index=2
At RealTeachers, we usually use Menke as our main teaching platform. There are some opportunities to use different teaching platforms, such as ClassIn, to make it more convenient for our clients.
The following information relates specifically to a summer program using ClassIn, which has its own unique course schedule.
Let’s take the following time period as an example to demonstrate the course scheduling model of this project:
Course time (Paris time)
The first session 10:50-11:35
The Second session 11:40-12:25
Teachers need to enter the classroom at least 5 minutes before the first period of warm-up, that is, the teacher enters the classroom before 10:45, 5 minutes in advance.
During these 5 minutes, the teacher can play some music/videos to let students relax, entertain and get in a good mood.
When the first class ends, all members in the classroom will be forcibly logged out by the system. After that, teachers need to go directly to the next class (both are preset class times) for a 5-minute class warm-up, and then the second class starts on time.
During these 5 minutes, teachers can turn off their cameras and microphones, play some music/videos, and allow students to rest, drink some water, or go to the toilet.
After a short break of 5 minutes, we officially started the second class.
So that, the class pattern will be like this:
Warm up 1 :10:45:10:50 (5 mins)
The 1st Session :10:50-11:35 (45 mins’ session)
Warm up 2 :11:35:11:40 (5 mins)
The 2nd Session :11:40-12:25 (45 mins’ session)
☞ As mentioned above, during the two 5-minute warm-up sections, the teacher can play a video related to the lesson, and you can turn off the camera without interacting with the students, just play an active children’s song to relax the students. that’s all.
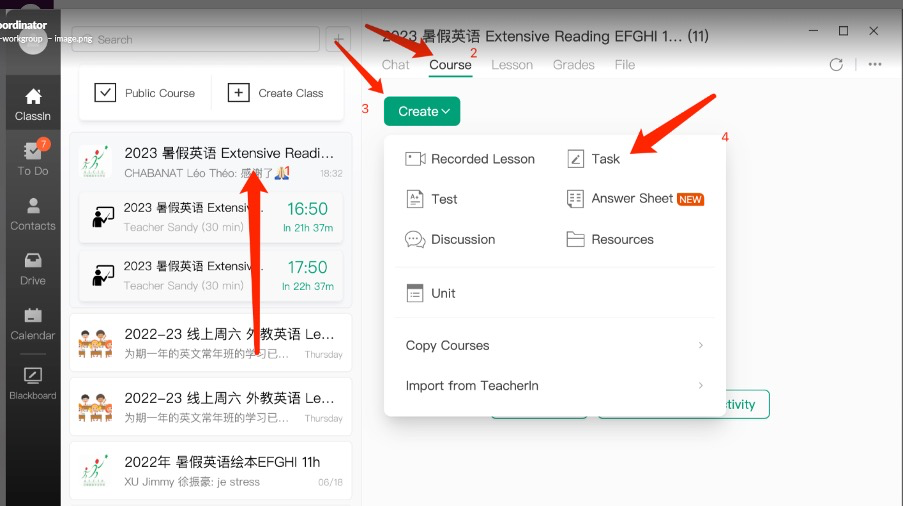
➣ For warm up, you can use the classroom’s built-in browser function to play videos, and remember to turn on Share Sound
➣ (please compare to the following image to operate correctly)
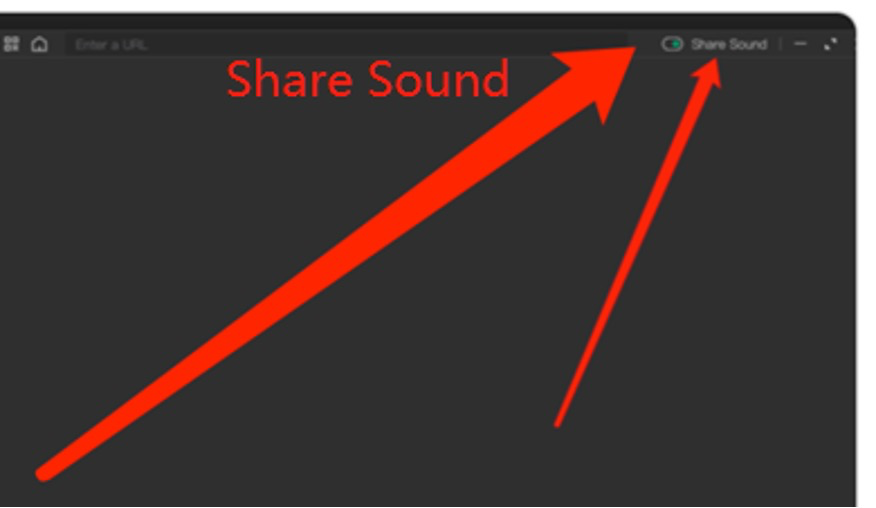
➣ We’ve introduced this function in ClassIn training section